Introduction
Webhook integration allows you to connect your existing systems and processes to Profyle Card. When an event happens within the Profyle Card system, information on this event can be sent to your API or systems via a Webhook.
Webhook endpoint and security
When you enable the Profyle Card Webhook Integration, you have the ability to provide a URL and a “secret”. When Webhooks are triggered within the Profyle Card system, this URL will be sent a POST request that contains a JSON payload in the body of the request. This body will contain a key named “secret” that will contain the secret that you specify. This should be checked by your system to ensure that other people are not sending data to your Webhook endpoint.
Supported events
A number of events are supported by our Webhooks. As few or as many of these events can be enabled as required. You will not be sent events for events that you have not enabled for your Webhook. All Webhook events can be disabled by disabling the webhook from within the Webhook Integration Settings screen.
The supported events are as follows:
Test (webhook.test)
Triggered manually from the webhooks settings screen
Introduction Created (introduction.created)
Triggered after an introduction between a Profyle owner and a visitor is made
Profyle Page Visited (profyle.visited)
Triggered any time a users’ Profyle is visited
Profyle Created (profyle.created)
Triggered when a user Profyle is created
Profyle Deleted (profyle.deleted)
Triggered when a user Profyle is deleted
Subscription Allocated (subscription.allocated)
Triggered when an available subscription is allocated to a Profyle
Subscription Released (subscription.released)
Triggered when a subscription is released from a Profyle, making it available for use again
Data payloads
All webhooks are sent as an HTTPS POST request and will contain a JSON object in the request body containing at least the event name, your secret string and an ISO8601 formatted timestamp of when the webhook was triggered. An additional key named “data” will contain the specific data payload for the event. For example:
{
  "event": "EVENT-NAME",
  "secret": "YOUR-SECRET",
  "timestamp": "2024-01-01T12:00:00.000Z",
  "data": {
    "attribute": "value"
    ...
  }
}
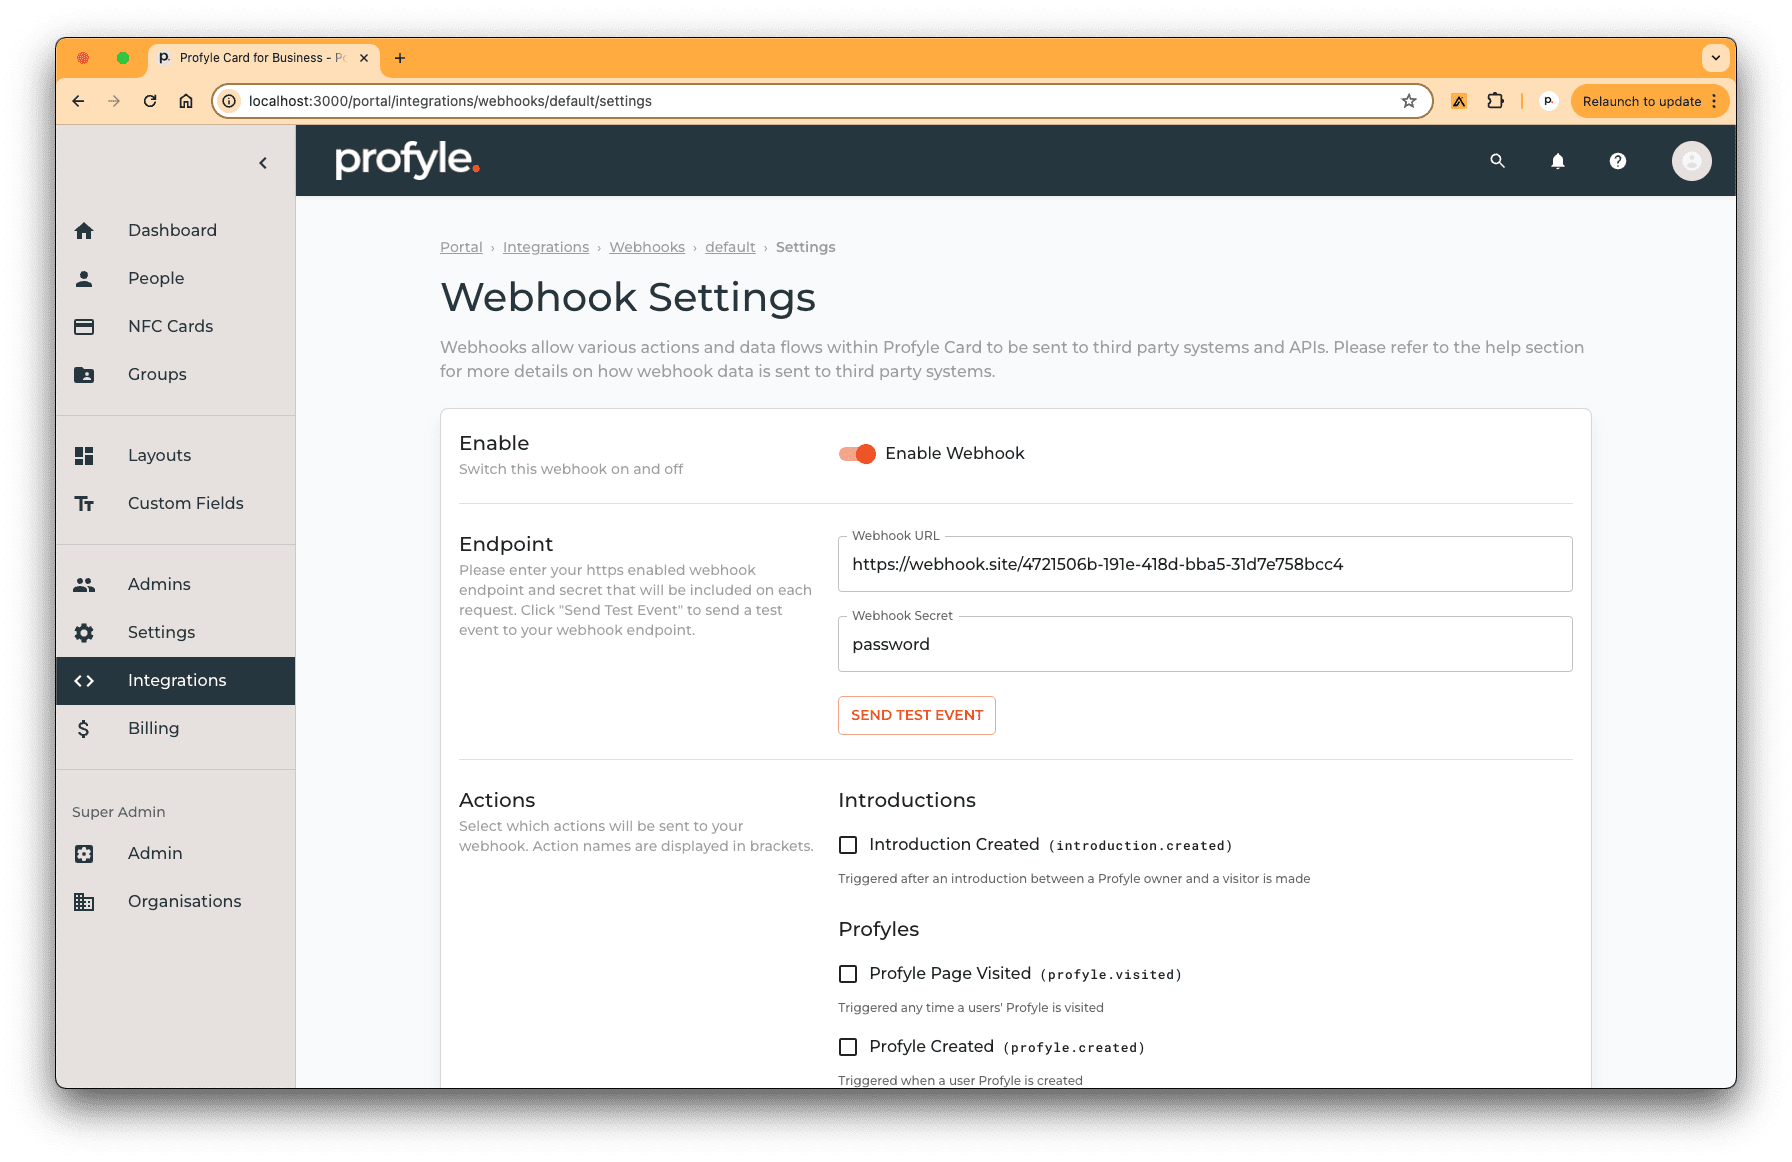
Setting up your webhook
Webhook settings can be found within the “Integrations” section of the Enterprise Portal. After clicking “Settings” from the “Webhook” box, you’ll be presented with a screen allowing you to enable or disable the webhook, set the endpoint, secret and select which actions are triggered:
Testing your webhook
To test the webhook and inspect the contents of the payload, we recommend using a tool like https://webhook.site/ which can provide you with a temporary URL that you can view the webhook requests before integrating them into your own system.
Triggering a test event
From the Webhook Integration Settings screen, a button named “Send Test Event” can be used to send a test event to the URL and secret supplied. Please remember to press “Save” if you want to make permanent changes to these values.
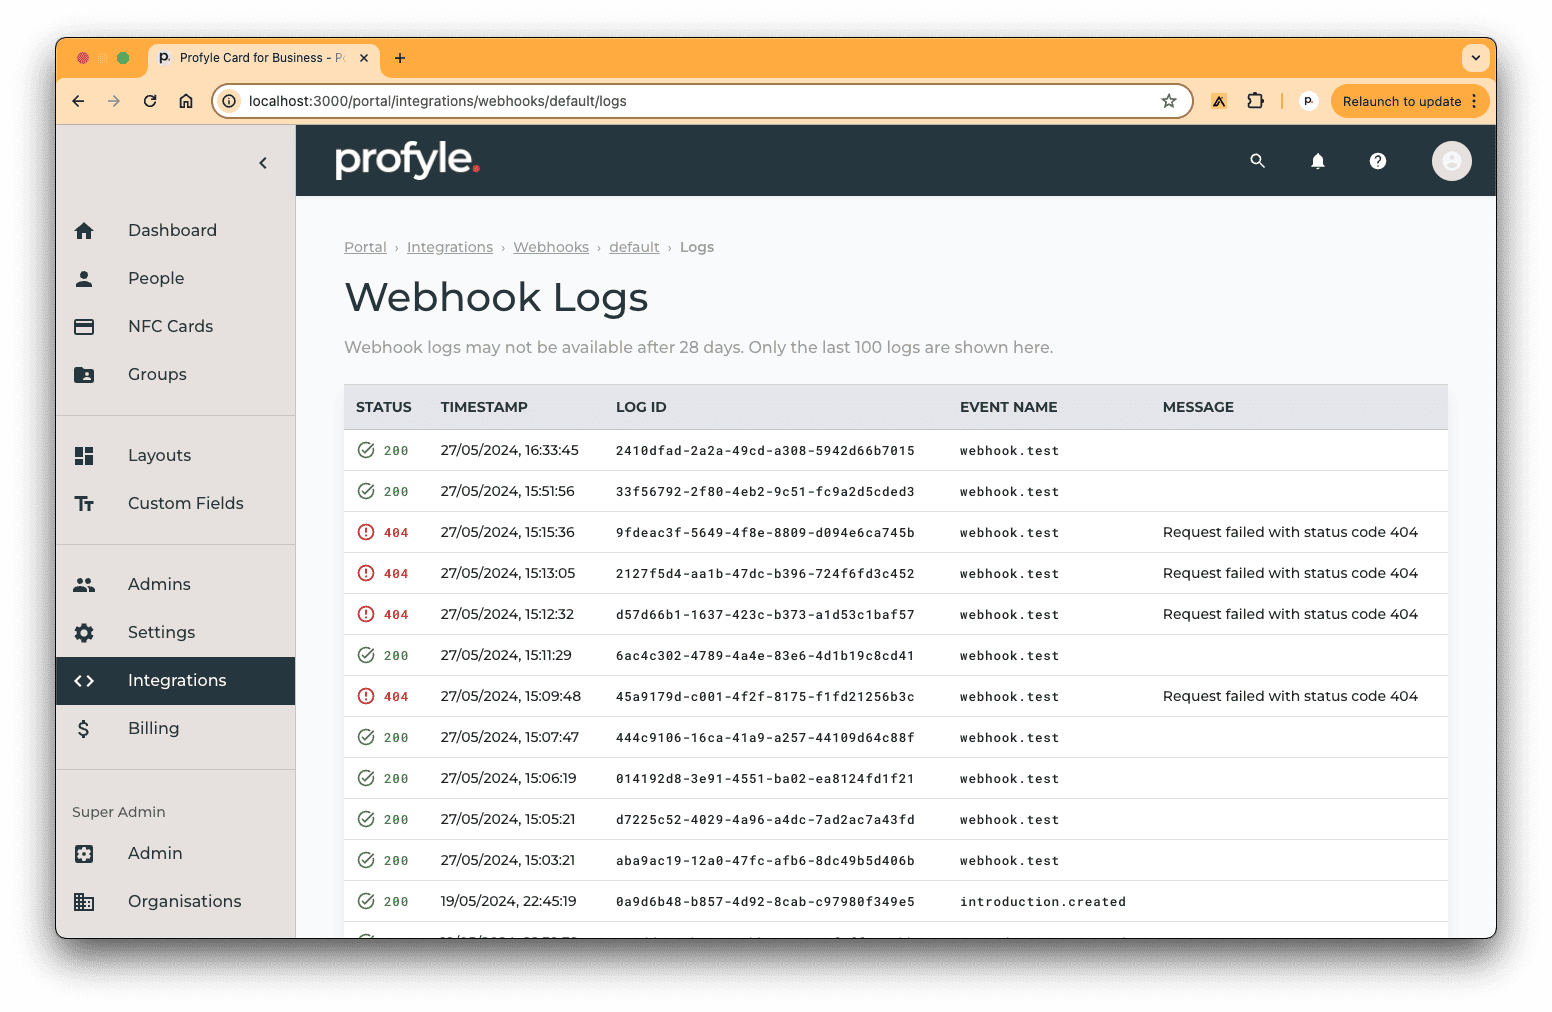
Viewing webhook request logs
Each time a webhook request is made (including test events), the request is logged for debug purposes. This can be viewed within the “Webhook Logs” section.
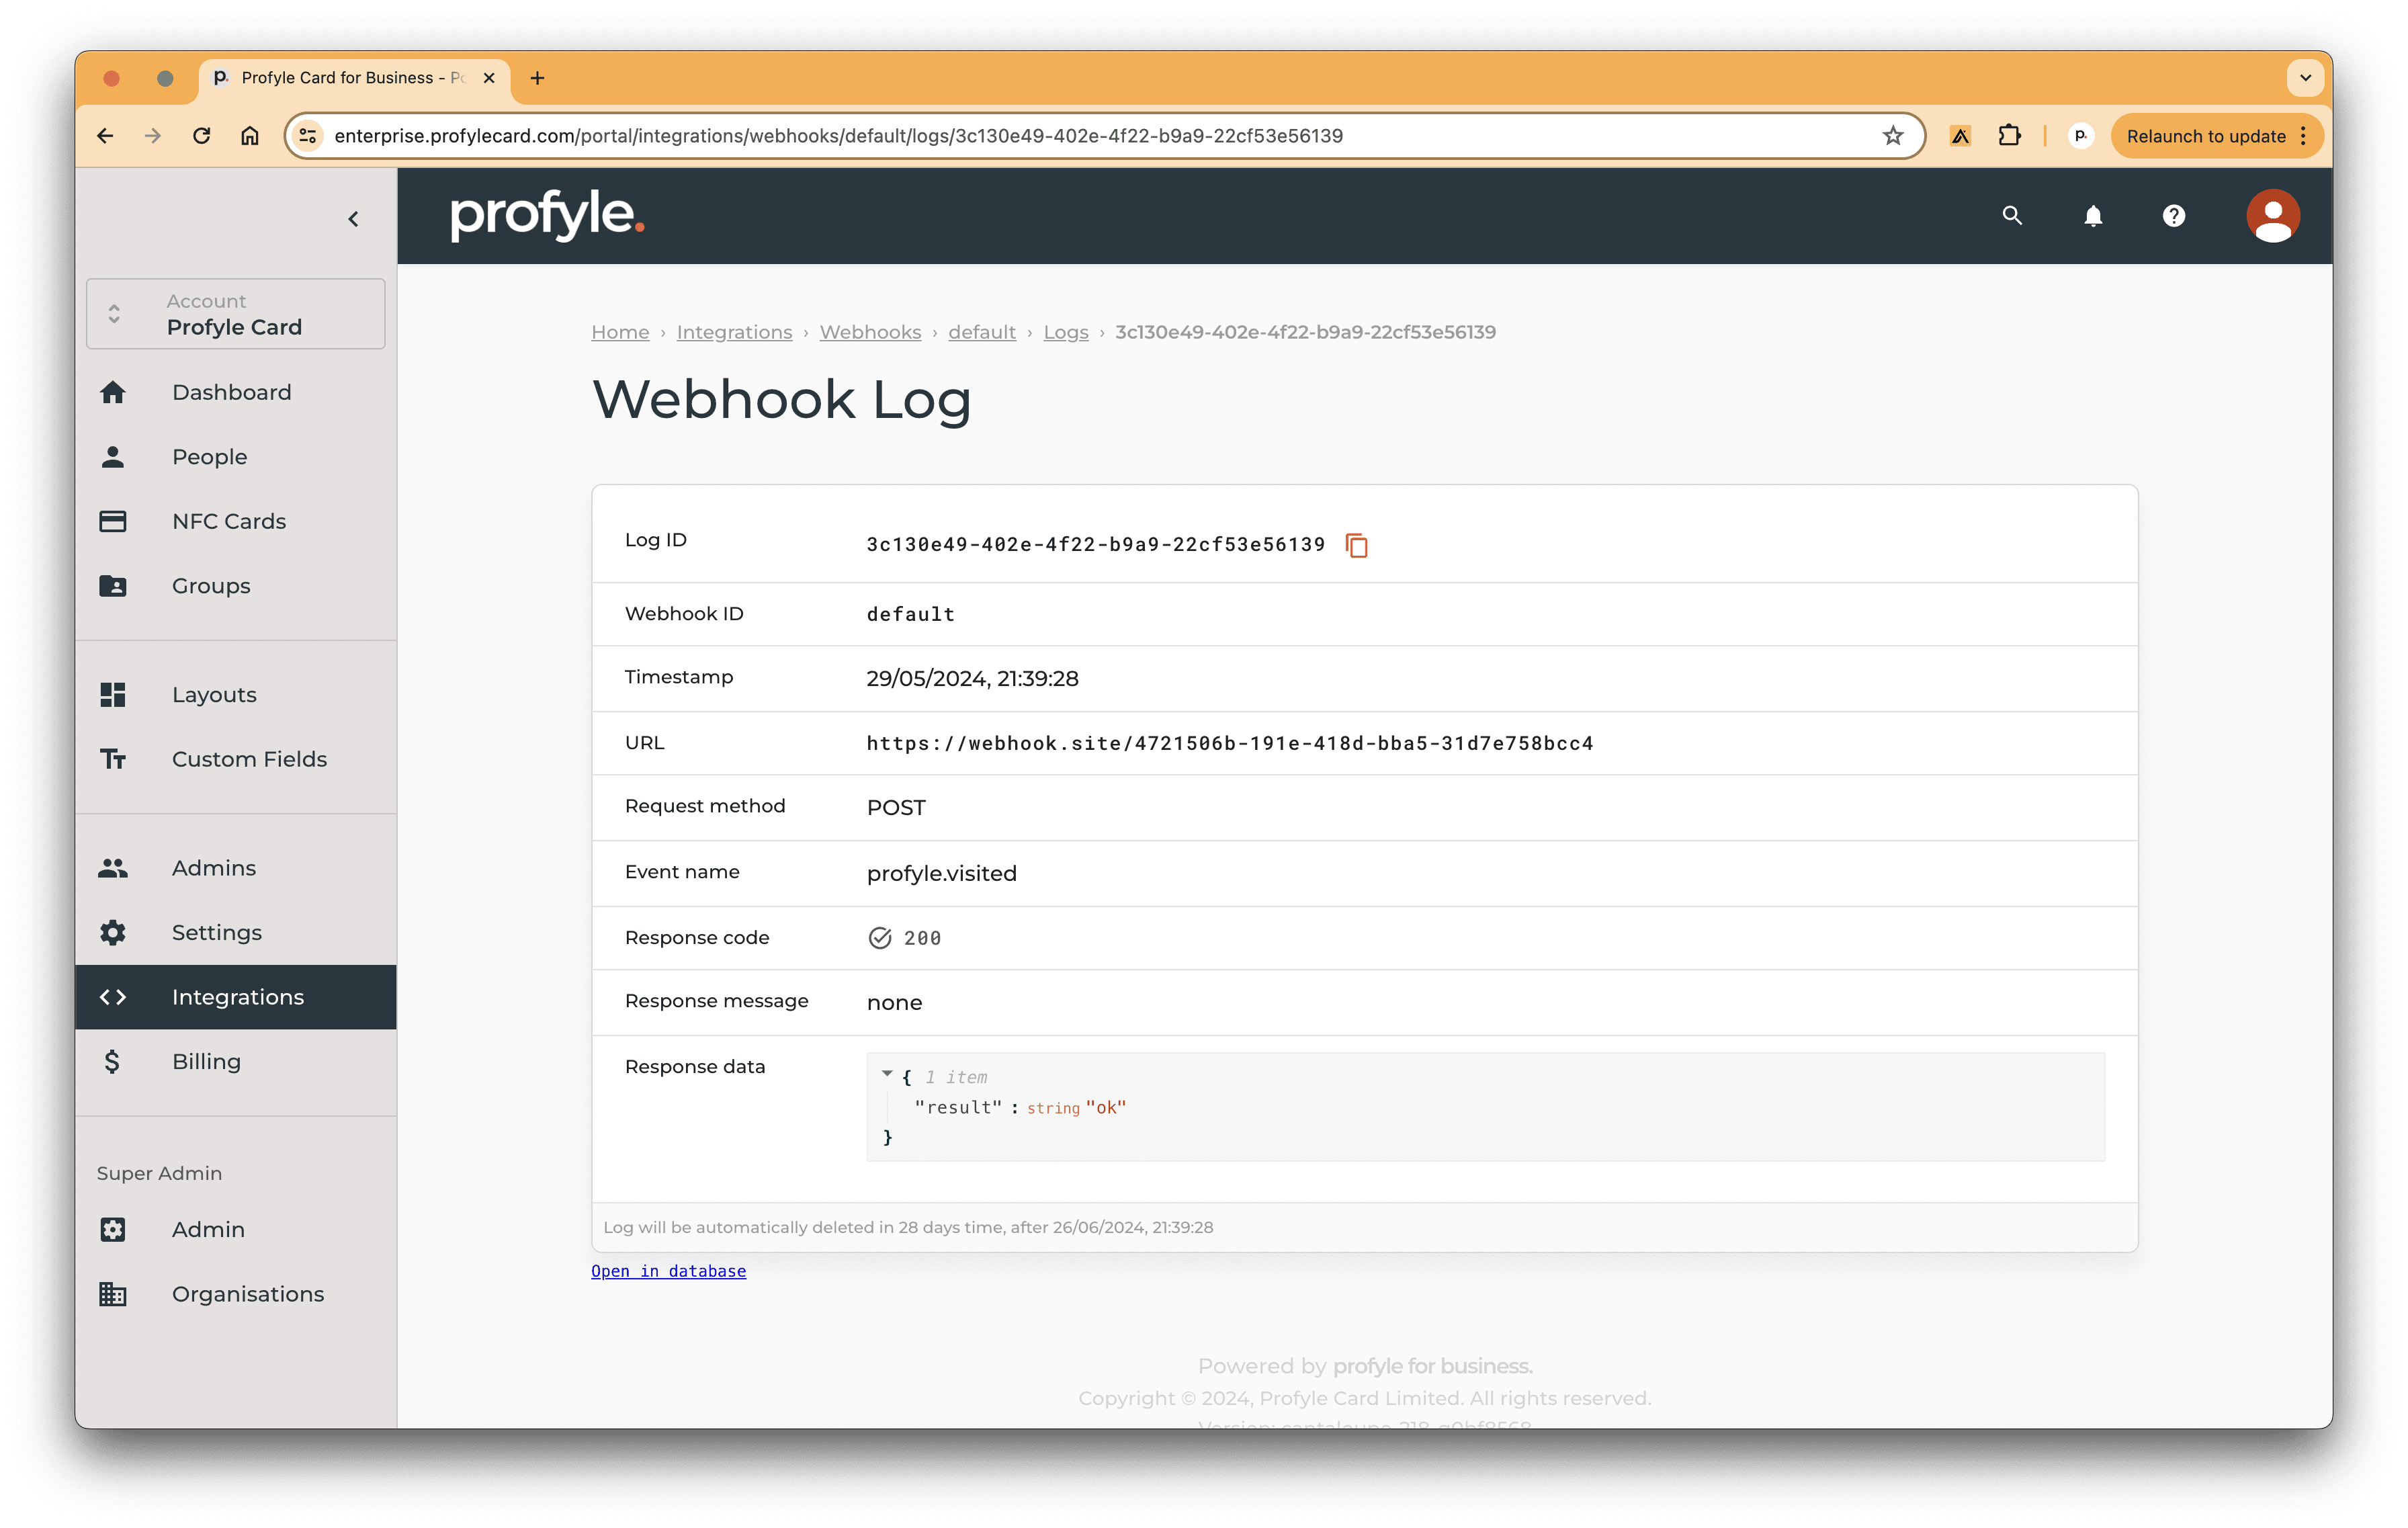
Clicking on a row within the logs will load more detail on the request including the response data:
Multiple endpoints
We do have the facility to setup multiple endpoints for customers, however only a single “default” webhook integration can be set up from the admin portal. If you have a requirement for multiple endpoints or different endpoints for different event types, please contact Profyle Card support.